http://repository.readscheme.org/ftp/papers/ai-lab-pubs/AIM-453.pdf
further Scheme research:
icbins: from http://www.accesscom.com/~darius/
with further interesting code there...
from the README from icbins:
Here we have an exercise in stripping a Lisp to barest essentials, dropping the host tether early, and repeatedly changing and rebuilding, to practice evolving a self-hosted system. Only the garbage collector and the lowest-level Lisp primitives are in C. The source is an order of magnitude smaller than the already-lightweight UTS's. You might find this of interest if you want to do similar exercises or if you'd just like to read a tiny Lisp system with no magic (small self-hosting Lisps typically rely on powerful primitives like READ, PRINT, and GC). This could be cut down further; hopefully I'll come back to it someday.
-a) checl we have ftdi_sio and usbserial modules built and loaded
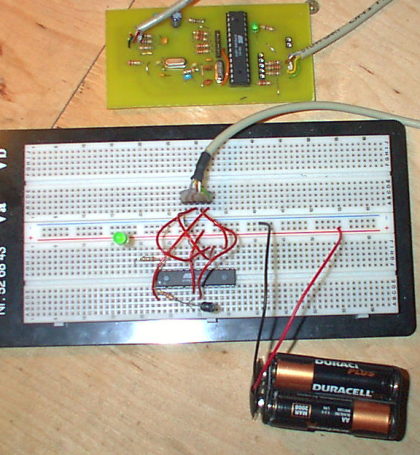
a) we have the Arduino codebase
b) on Gentoo: emerge crossdev (had to first set PORTDIR_OVERLAY=/usr/portage in /etc/make.conf)
takes some time...
c) emerge avrdude programming utility AFTER b) succeeds
d) check out Makefile and modify as below
# Arduino makefile
#
# This makefile allows you to build sketches from the command line
# without the Arduino environment (or Java).
#
# The Arduino environment does preliminary processing on a sketch before
# compiling it.  If you're using this makefile instead, you'll need to do
# a few things differently:
#
#   - Give your program's file a .cpp extension (e.g. foo.cpp).
#
#   - Put this line at top of your code: #include <WProgram.h>
#
#   - Write prototypes for all your functions (or define them before you
#     call them).  A prototype declares the types of parameters a
#     function will take and what type of value it will return.  This
#     means that you can have a call to a function before the definition
#     of the function.  A function prototype looks like the first line of
#     the function, with a semi-colon at the end.  For example:
#     int digitalRead(int pin);
#
# Instructions for using the makefile:
#
#  1. Copy this file into the folder with your sketch.
#
#  2. Below, modify the line containing "TARGET" to refer to the name of
#     of your program's file without an extension (e.g. TARGET = foo).
#
#  3. Modify the line containg "ARDUINO" to point the directory that
#     contains the Arduino core (for normal Arduino installations, this
#     is the lib/targets/arduino sub-directory).
#
#  4. Modify the line containing "PORT" to refer to the filename
#     representing the USB or serial connection to your Arduino board
#     (e.g. PORT = /dev/tty.USB0).  If the exact name of this file
#     changes, you can use * as a wildcard (e.g. PORT = /dev/tty.USB*).
#
#  5. At the command line, change to the directory containing your
#     program's file and the makefile.
#
#  6. Type "make" and press enter to compile/verify your program.
#
#  7. Type "make upload", reset your Arduino board, and press enter  to
#     upload your program to the Arduino board.
#
# $Id$
in:
http://1010.co.uk/arduino/Makefile
e) test code:
http://1010.co.uk/arduino/blink1.cpp
make: avr-g++: Command not found
next try: (after: http://www.arduino.cc/playground/Linux/Gentoo )
USE='-nocxx' emerge cross-avr/gcc cross-avr/avr-libc
make succeeds - we have a blink1.hex and so on
f) make upload
...
few changes to Makefile for avrdude and avrusb500 programmer, updated to new core Arduino necessitating more Makefile changes and now programs fine with 5v attached to ATmega on breadboard
g) pin mapping: http://www.arduino.cc/en/Hacking/
eg. digital pin 13 in blink LED example is true ATmega8 pin 19
// On the Arduino board, digital pins are also used
// for the analog output (software PWM).  Analog input
// pins are a separate set.

// ATMEL ATMEGA8 / ARDUINO
//
//             +-\/-+
//       PC6  1|    |28  PC5 (AI 5)
// (D 0) PD0  2|    |27  PC4 (AI 4)
// (D 1) PD1  3|    |26  PC3 (AI 3)
// (D 2) PD2  4|    |25  PC2 (AI 2)
// (D 3) PD3  5|    |24  PC1 (AI 1)
// (D 4) PD4  6|    |23  PC0 (AI 0)
//       VCC  7|    |22  GND
//       GND  8|    |21  AREF
//       PB6  9|    |20  AVCC
//       PB7 10|    |19  PB5 (D 13)
// (D 5) PD5 11|    |18  PB4 (D 12)
// (D 6) PD6 12|    |17  PB3 (D 11) PWM
// (D 7) PD7 13|    |16  PB2 (D 10) PWM
// (D 8) PB0 14|    |15  PB1 (D 9) PWM
//             +----+
h) one problem with Scheme/Arduino plan is presented by wiring.c which wraps setup and loop into main function.. but we could easily replace this
http://www.ftdichip.com/Products/FT232BM.htm
Using the AVR programmer USB, stk500 V2 compatible from:
http://shop.tuxgraphics.org/electronic/microcontroller.html?id=2b93dd
(with thanks to Guido)
Further documentation online at:
http://www.tuxgraphics.org/electronics/200510/article05101.shtml
and also for avr-gcc:
http://www.tuxgraphics.org/electronics/200411/article352.shtml
notes:
mkdir /tmp/mnt
mount -o loop /mnt/cdrom/KNOPPIX/tgr/avr.img /tmp/mnt
cd /tmp/mnt
find avr* | cpio -dump /usr/local/
cd ; umount /tmp/mnt

# and add bin to PATH.

PATH=${PATH}:/usr/local/avr/bin/
export PATH
Makefile is at:
http://main.linuxfocus.org/common/src2/article352/Makefile.html
and uses avr-gcc, avr-objcopy and prg_load_uc shell script which references:
avrdude -p m8 -c avrusb500 -e -U flash:w:"$pfile"
prg_fusebit_uc is also used to "read and write fuse bits of the atmega8"
AvrUsb500 Programmer Kit
mentioned below (notes on this to follow).
http://www.arduino.cc/playground/uploads/Learning/Makefile
# This makefile allows you to build sketches from the command line
# without the Arduino environment (or Java).
#
# The Arduino environment does preliminary processing on a sketch before
# compiling it.  If you're using this makefile instead, you'll need to do
# a few things differently:
#
then compiles and links with Arduino library .c (and .cpp) files
and further compiles using avr-gcc, avr-objcopy and so on and uploads with avrdude.
or rather:
an interpreter or vm (virtual machine) in flash
http://amforth.sourceforge.net/
as in:
amforth is a distribution of Forth running on the AVR ATmega microcontroller. Once put into flash, it needs only a serial connection to the host computer. New words are compiled directly into flash, thus extending the dictionary immediately. It is ans94 Forth oriented with some minor exclusions and a few words from the extension word sets. It is written in assembly language and Forth itself. The main development uses ATmega8 and ATmega32 controllers; other ATmega controllers should work with small adjustments.
See particularly for commandline use:
http://www.arduino.cc/playground/Learning/
AVR programmer USB, stk500 V2 compatible
http://shop.tuxgraphics.org/electronic/microcontroller.html?id=2b93dd
http://www.tuxgraphics.org/electronics/200510/article05101.shtml
gcc-avr
avr-libc
avrdude
http://www.hanssummers.com/electronics/misc/gates/index.htm
PISC:
The Pathetic Instruction Set Computer is a model processor constructed entirely of discrete logic, illustrating the principles of both hardwired and microprogrammed CPUs. Requiring only 22 standard TTL chips (excluding memory)...
http://www.zetetics.com/bj/papers/piscedu2.htm
and a relation:
Mark 2 FORTH Computer
http://www.holmea.demon.co.uk/Mk2/Architecture.htm
and some lists of links: